DermLite Cam Color Calibration
Here is how to calibrate the color of your DermLite Cam.
Minimum requirement: Firmware version UPDATE_V2_REV0012 or later must be installed.
1. Enter Color Calibration Mode
a. Enter Image Review screen by capturing an image using the shutter button.
b. Tap on the gear icon to enter the settings screen.
c. Tap on [CALIBRATE] to enter color calibration mode.
2. Calibrate color in each lighting mode
a. Position the gray color calibration card in front of the camera such that the
calibration color card completely fills the yellow on-
b. Once complete, tap [OK] to save color calibration settings for the particular lighting mode.
c. Change to the next lighting mode by either tapping the red button on top of the
camera or extending/retracting the extension arm, and repeat steps 2a -
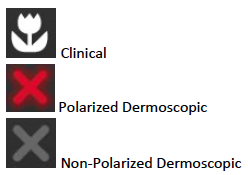
Be sure to calibrate all three lighting modes. The current lighting mode is shown by the icon in the top right corner of the calibration screen.
Note:
Clinical mode is enabled by extending the extension arm.
Dermoscopic mode is enabled by retracting the extension arm.
Polarized/Non-